Compositing Live Action And Blender Objects
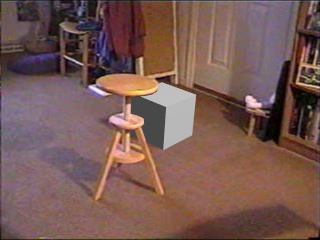
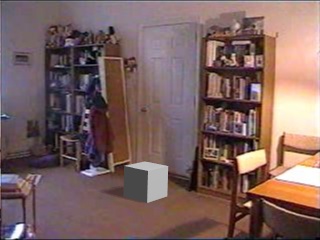
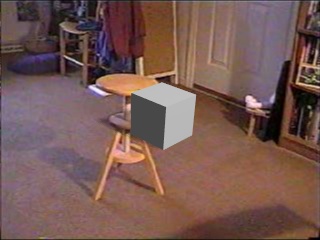
First take a look at Figure 1. It's a picture of my living room. We'll be compositing a cube into this scene. If you have anything more interesting than a cube, though, you're welcome to use that.

We'll start from the default Blender scene. If you've changed your default, add a plane and a camera now.
Select the plane, if it isn't already selected, by right-clicking on it. This plane is going to represent the door in Figure 1. It's a good idea to have an object like that in your scene, so you can figure out where to put the camera. I measured the door, and it's 79.75 inches high, and 35.5 inches wide. So with the plane selected, press N. Set SizeX to 35.5, and SizeY to 79.75. This makes the door object the right aspect ratio, but far too big. So you can size it down now, by pressing S, to just be a few units high.
Right now the door is horizontal; it should be vertical. So move to side view by pressing 3 (on the numpad), then press R to rotate. While rotating you can hold down Ctrl to rotate in increments of 5. Rotate it 90 degrees.
Select the camera, and press F9 to go to the edit buttons. I *think* my camera's lens thingy is 40.5; I'm not sure at all, in fact I'm probably totally wrong, but it seems to work well enough. So Shift+click the Lens button, and change the number to 40.5.
Now go to the display buttons by pressing F10, look at the SizeX and SizeY buttons and make sure they are 320 and 240, respectively. You could use something bigger like 640 by 480, as long as it's the same aspect ratio, but the live action picture is 320 by 240, so it won't look as good if you make it bigger. While you're there, turn on OSA and Shadows.
Go to front view by pressing 1 (on the numpad), and add another plane. Press Tab to leave edit mode. Move to top view by pressing 7 (on the numpad), and move it away from the camera, reasonably far away from the door. Move to camera view by pressing 0 (on the numpad), and size the plane up so that it fills the camera view. Now go back to top view again, and with the plane selected, Shift+select the camera, and press Ctrl+P to make the camera the parent of the plane.
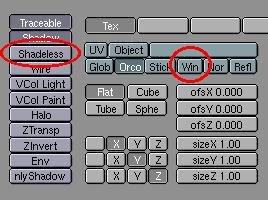
Select the plane, and press F5 to go to the material buttons, and add a new material. You can call it "Background" if you want. Press F6 to go to the texture buttons, and add a new texture. You can call this texture "Background" if you want. Make it an image texture. Use Figure 1 as the image. Then go back to the material buttons. Set "Shadeless" and "Win" as shown in Figure 2. Now select the door object and assign the same material to it.
Press Shift+F7. Click "BackGroundPic". Then click the - next to where it says "Select texture for animated backgroundimage," and choose the "Background" texture. Press Shift+F5 to get back to the 3D window. You'll notice you can see the background now.
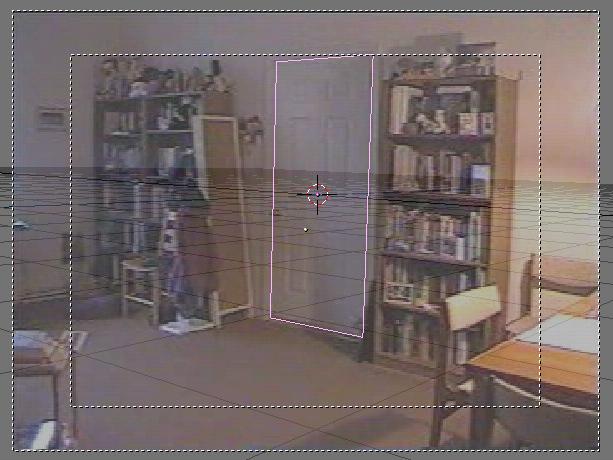
Select the camera, and go back to camera view. Move it around with G and R (try pressing the middle mouse button while moving or rotating to move or rotate along different a different axis) until the door object lines up with the background picture, like in Figure 3. This way the camera in the 3D world is in the same place and pointing the same way as the camera in the real world.
Now from top view, add a plane. This will be the floor, so place it slightly under the door and make it nice and big. Go to the material buttons and add a new material for it. Like in Figure 4, press OnlyShadow and ZTransp, and adjust Alpha so the darkness of the shadows look like the darkness of the shadows in the picture. 0.367 worked for me, you might need something different. You'll probably want to adjust this later on once you have something to cast a shadow.

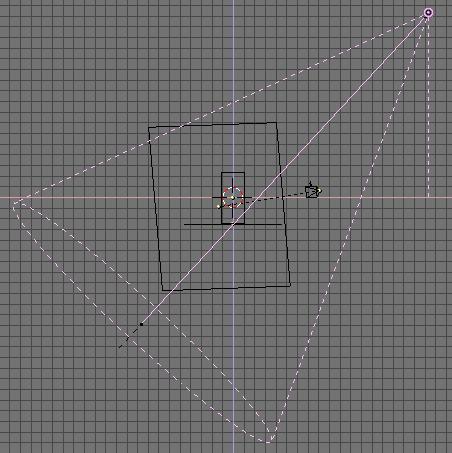
Add a spotlight and a hemi light, in the same place. This is just a very simple lighting setup. Put them roughly where the light is coming from in the background picture. See Figure 5.
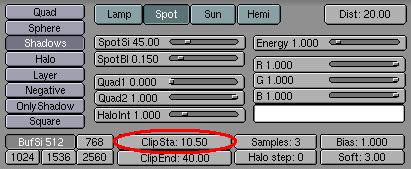
With the spotlight selected, press F4. Set ClipSta a little higher, as shown in Figure 6, so that the pink line with a black dot at either end starts just a little before the objects in the scene.
Now, add a cube (or something else if you want to). Put it a little in front of the door, and render. If the shadow looks wrong, you can adjust it like I mentioned earlier and render again. Ta da! The result is shown in Figure 7, and you can download the .blend file for it, as you can see.
Click here for the .blend file for Figure 7.
But what if you want to put the cube behind an object in real life? You may want to save what you've done so far and then save as a new file, since we'll be making a bunch of changes.
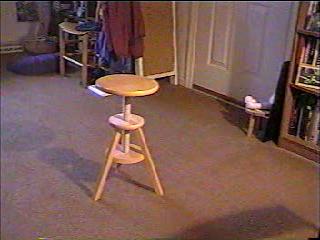
The first thing we're going to do is replace the background with Figure 8. Select the background plane, press F5, and then F6. Change the image to Figure 8. Now, since I took this picture from a different angle, select the camera, go to camera view, and move the camera around until the door object lines up with the door in the picture, just like we did last time.
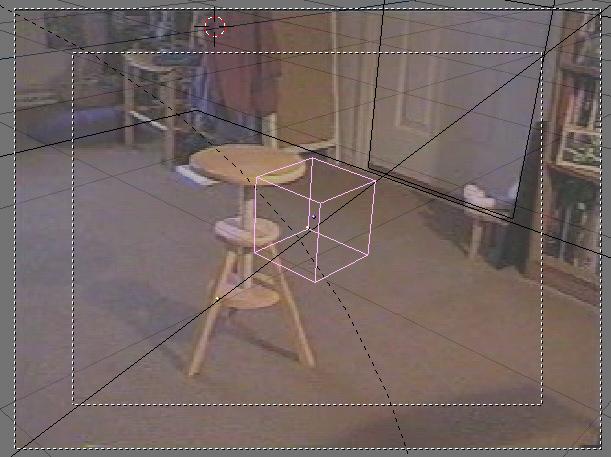
Then, if you have to, move the cube so it's behind the stool in the picture. See Figure 9.
Now, if you render, it looks all wrong. See Figure 10. So what you have to do is create an object in the shape of the stool, and put it in front of the cube. For this picture, it can be 2D, but if you were going to show it from another angle as well, you might want to make a 3D model of the stool.
So, making sure that the cursor is slightly in front of the camera, go to camera view and add a plane. Assign the background texture to it. Then, doing all the modeling in camera view, move, rotate, size, and extrude vertices until you have an object that looks like the silhouette of the stool. This might take a little while to make. There's a picture of mine in Figure 11.